Changing the Oil Filter on Your Boiler:
If you want your boiler to stay in good condition, you will need to change its oil filter regularly. Your boiler’s oil filter has a very important job: preventing small particles that cause damage, such as dirt and dust, out of your boiler. Once inside, such particles can circulate, causing abrasive damage and reducing your boiler’s efficiency. Needless to say, it is better to prevent these kinds of problems now than repair them later, so keeping your oil filter effective is very important. Fortunately, changing your boiler’s oil filter is a simple procedure that you should be able to do yourself without any problems. What follows should give you everything you need to know about how to do it.
Step 1 – Removing the Power
Changing the filter in your boiler, while simple enough to do, is complicated enough that it requires some planning to ensure that nothing goes wrong in a way that causes you actual problems. Because of this, be sure to spend the minimal amount of time required to set up properly, as it could save you a lot of time or money in the long run, as well as protecting your safety.
Before you do anything whatsoever, turn off the power to your boiler at the circuit breaker. Next, turn it off at the cutoff switch. The cutoff switch can be located in a number of places. More likely than not, it is close to the boiler itself, but it may be near the entrance to the boiler room.
Finally, close the oil supply valve. Once you have done this, you must wait for the boiler to cool down to proceed.
Step 2 – Protecting the Floor
First, cover the floor of your work area with newspapers. This is to ensure that no oil stains your floor. You do not need to cover a very large area, but be sure to cover the area immediately surrounding your boiler.
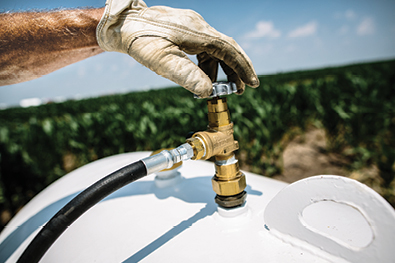
Step 3 – Removing the Filter
Before you touch anything, put on your plastic gloves to protect your hands. Next, place your plastic bag under the oil filter to catch it and as much oil as possible when you remove it. Hold it there with one hand. Use your other hand to hold your wrench. With your wrench, loosen the nut holding the oil filter in place. Once you have done this, you can remove the oil filter and get it into the plastic bag with a minimal amount of trouble.
Step 4 – Replacing the Filter
Now you can install your new oil filter. Get out your new oil filter and insert it where you removed the old oil filter. Next, put your new gasket on top. Close the housing and use your wrench to shut it tightly. Finally, once you are done, you can turn on the power to your boiler at your circuit breaker and the cutoff switch, and turn on the supply valve for oil.
When you do this, check to make sure everything is working correctly. Be on the lookout for oil leaks, as this can be a common problem if something is not installed correctly.
Special Thanks to DoItYourSelf.com for the great article. Read the full article here: //www.doityourself.com/stry/how-to-change-the-oil-filter-on-your-boiler